Performing a leak test on big parts poses big challenges. But, as is the case with any leak test scenario, if you know and control your variables, you can control the test. Here are 4 tips to help you achieve a reliable and repeatable leak test.
Know which variables are in your control
Let’s start by making one thing clear—nobody can change physics.
By this I mean, in any test there are a fixed number of inputs to the equation that models the result. Some we control, others we only monitor.
Part volume is in the second category. The larger the internal volume of the part, the more air we must pump into the part to test it. The greater the air volume, the greater the impacts of pressure and temperature shifts, skewing the reliability and repeatability of test results. The less rigid a part, the more it will change in size as it is filled and tested.
You must take into account these variables to ensure an accurate test result.
Choose the right leak testing method
Two common methods for large volume leak testing are pressure decay leak testing and mass flow leak testing.
Pressure decay leak test
With pressure decay leak testing, the part is pressurized—filled with air until it reaches a set pressure—then isolated from the supply pressure. The pressure within the part is then monitored using a pressure sensor, and as the air leaks out, the pressure drops. The leak rate can then be calculated based on the change in pressure over a certain period of time. Pressure decay is ideal for testing very small leak rates on rigid volumes. This is due to eliminating one variable, test pressure, during the stabilize and test portions.
Mass flow leak test
With mass air flow leak testing, the part is also pressurized, but in this case the part remains connected to the supply pressure. Once an equilibrium is reached and the pressure inside the part is stabilized, the amount of gas flowing in from the supply must be equal to the total leakage of gas out of the part. In this case the leak “rate” is measured directly, and no conversion calculation is necessary. Also, since the pressure inside the part stays constant, the volume of air within the part will remain the same—remedying a common issue when testing flexible large volume parts.
The winner is…
It depends.
Large volume leak test stations often contend with testing a variety of different parts, each with different internal volumes. This makes mass flow leak testing the better option of the two leak testing methods for large part leak test, as mass flow leak testing is volume independent—meaning that one test configuration can be used with the variety of different parts at these stations, for a more efficient and effective test.
Pressure decay testing is volume dependent meaning it requires a different calculation for each part size. This would make it more difficult and time consuming to test the variety of parts moving through this station. However, if only a small number of part variants are present, or controlling pressure within the part is an issue, pressure decay can be the best choice.
Optimize cycle time
To optimize cycle time and still get an accurate result on the test, we must take into consideration two factors at play.
Factor 1: Temperature
The first factor is temperature. The faster we can fill the part, the faster we can test it. But when we fill the part, we are compressing the air inside, which builds up heat that will naturally dissipate into the part as it reaches equilibrium. As the air inside the part cools (thermal stabilization), the leak we measure is influenced by the loss of energy and decreased temperature. This causes drop in volume and thus pressure. Until the temperatures equalize, the true leak of the part is not being measured.
Factor 2: Leak rate and volume
The other consideration is that the lower the target leak rate and the larger the part volume, the longer this process typically takes to finish. Put another way, think of the leak rate as the signal, and the thermal stabilization as the noise. The smaller the signal you are trying to measure, the more time you have to wait for the noise to dissipate.
To gauge the true leak rate without adding to the test’s cycle time, you must counter both of these factors, relying on physics and controlling consistency.
Control supply pressure for consistency
Physics are repeatable, meaning the thermal influences on the measured leak will be the same if the test process is consistent.
Consistency comes from controlling the energy transfer. The fill rate and duration rely on the pressure regulator to ensure the rate of fill is always the same.
We want to fill the part to a consistent pressure at a consistent rate each time. When it is very critical, we do a “ramped” fill, where we set a start and end pressure, and a duration (say 0-5 psi with a duration of five seconds, which will raise the pressure 1psi/s).
But bear in mind that one shortcoming of mass air flow testing is that it is sensitive to fluctuations in test pressure. Achieving consistency in the test pressure demands a constant and reliable supply source.
Importance of ensuring a constant, reliable supply pressure
When you control pressure regulation and ensure a stable supply pressure, it provides consistency in your measurement and consistency in how thermal stabilization will occur.
You can then chart and accurately predict the rate of thermal stabilization, to extrapolate the true leak rate without having to wait for the stabilization phase to complete. This avoids an overly long cycle time for the test.
It’s a simple old equation: What goes in will come out. The better you control the variables, the better the outcome.
Improve your leak test with our free e-book: “7 practical steps to a better manufacturing leak test”
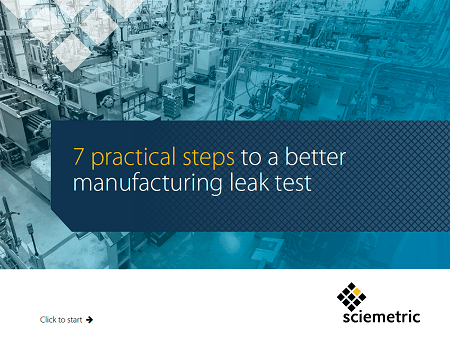
What you'll learn:
- 5 things to check to get the setup right
- 4 details to ensure repeatability
- What to look for in your leak test data
- The fastest way to set the right test limits
- 6 tips to shorten cycle time
- 4 ways to keep your leak tester honest
- How to use your warranty claims for continuous improvement